
Taking Control of Aligners with 3D Printing
- Home
- Taking Control of Aligners with 3D Printing

Mark McInnis, DMD, shares the lessons he’s learned while building a digital practice incorporating the latest 3D printing technology and aligner planning software
By Alison Werner | Photography by Carl Ackerman
Implementing an intraoral scanner into the orthodontic practice opens up a world of possibilities. For South Carolina-based orthodontist Mark McInnis, DMD, it led to the purchase of a 3D printer and manufacturing aligners in-office. But more than anything, it put his practice at the forefront of the digital evolution of orthodontics.
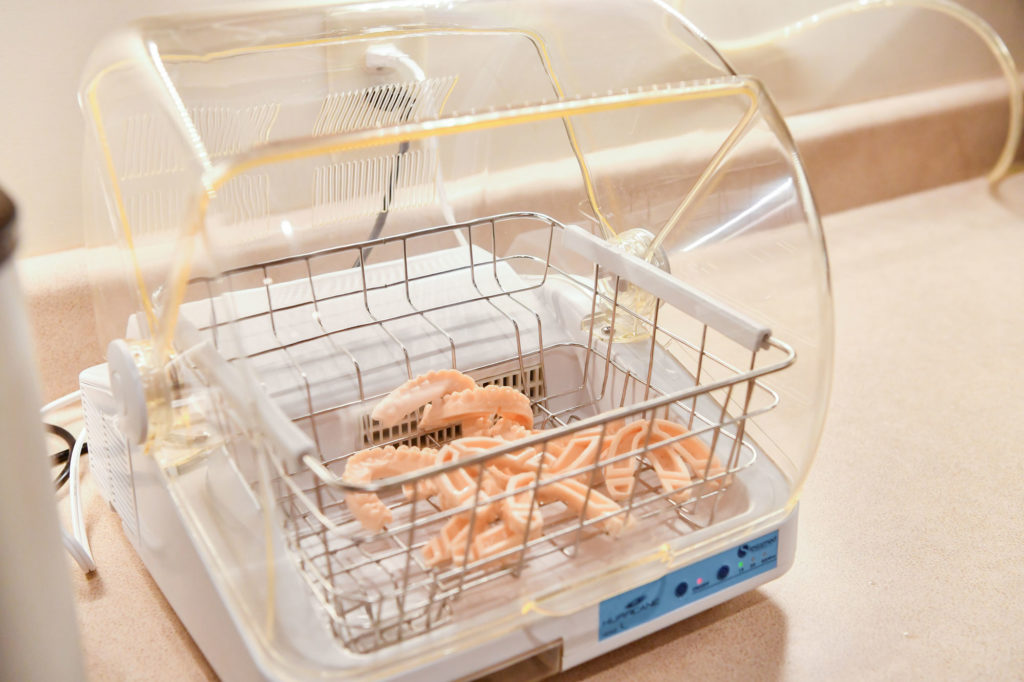
Three years ago, when McInnis set out to incorporate 3D printing into his Clemson, SC practice, Upstate Orthodontics, he knew he wanted to ease into it and avoid stressing his staff and disrupting their workflow. So, he opted for a relatively inexpensive, entry level consumer-grade printer that they all could learn on. They started, like most practices, with making retainers, even though that was not McInnis’ ultimate goal.
Over the course of a year, that first printer taught him some valuable lessons. While it made good fitting retainers and aligners, it had its fair share of issues. First, it was slow and unpredictable. Second, it lacked a good customer support system. When McInnis was ready to ramp up his in-office aligner offerings, he had two options: invest in his own print farm with multiple lower-cost printers or invest in a commercial-grade printer.
McInnis opted for the commercial-grade printer and purchased an EnvisionTEC Vida printer from 365 Printing at the American Association of Orthodontists (AAO) Annual Session in Washington, DC in 2018. As McInnis puts it, the DLP printer was a solid workhorse, but it was the customer service that came with it that swayed him. 365 Printing offers both in-office training and ongoing customer support. That peace of mind is key, says McInnis. “I don’t have to try and figure it out on my own. That safety net is huge.”

The Software Component
While at the same meeting in DC, McInnis also finagled his way into the pilot study group for uLab System’s aligner treatment planning software. McInnis made a point of demoing all the software options at that show and what attracted him to the uLab software was its simplicity and the automation. “It’s like using a Mac or iPhone versus a PC,” he shares. “It’s very intuitive.” At that point, the software already featured a number of automated processes, including tooth selection and alignment.
Since then, the automation within the uLab software has expanded to the 3D printing workflow. STL files are automatically labeled, trimmed, and exported to the printer. Exported files are then automatically arranged in the print tray. The software is compatible with the leading printers and thermoformers, and with the uContour feature can be automatically trimmed. The software also allows for same-day treatment starts and combination treatment, and includes advanced AI technology that will learn and apply the user’s preferences over time. uLab also provides the resources need to brand aligners.
McInnis has watched the software change over the last 2 years and welcomes the new tools uLab Systems has rolled out, including the retouch feature which allows the orthodontist to rescan a patient mid-treatment and not create a whole new treatment plan. Instead, the software marries the new image with the original scan to determine that patient’s current status, and then calculates where the final plan needs to go based off the original set up. “The retouch feature just allows you to save all that time on having to rebuild your case. Even when you pay an outside lab to do that, you generally end up having to tweak it…and often have to bounce back and forth with the technician. When you do them yourself, you can just sit down and knock it out completely just once,” he says.
As a member of the pilot study group, McInnis has witnessed the software’s evolution and has been impressed with the speed with which the developers have taken on feedback and adapted the platform. “They’re very open to feedback from their users and then adapting those good ideas into their platform, which is so refreshing,” says McInnis, who was also a beta user of Dolphin’s practice management software.

Time to Upgrade Printers
A year ago, McInnis decided it was time to upgrade his printer. With the uLab software, efficiency and productivity had increased. The volume of models his in-office lab was producing necessitated a faster printer. He opted for 365 Printing’s newest model—the EnvisionOne. He’d first seen the printer in action at a study club meeting. Using CDLM technology, the commercial-grade desktop printer’s speed and consistency impressed McInnis. With the EnvisionOne, McInnis’ practice is able to print 18 to 20 models vertically in a little over an hour. Why print vertically? As McInnis puts it, this orientation allows the user to print hollow, reducing resin waste and saving money. Moreover, it allows for self-draining and easier removal of the model. Another more important advantage: Users can print more models per print job. As the company puts it, vertical printing allows for a better workflow. Batching for larger print jobs can reduce computer time and post-processing time by 80%. McInnis was also drawn to the EnvisionOne’s reported accuracy when printing vertically, as this is often compromised with this orientation. According to 365 Printing, preliminary testing shows that printing vertically on the EnvisionOne is less than 1% quality difference than printing horizontally. After almost a year of use, McInnis has not had any issues with aligner fit.
Eventually, McInnis decided to buy a second EnvisionTEC One printer to ensure redundancy. “I believe redundancy is something that we need in our practices. It is a piece of equipment. It can go down. If it does go down, you need a backup. Even though I have enough customer support, I really felt the need to have two identical printers.” And the fact that he has chosen two identical printers is key. “I see a lot of practices in the Facebook groups talking about all the different printers they have. Having had different printers, the problem you run into is they use different software. When you go and build a print job on one printer, the next printer may be open, but you can’t send it to that one to print because you have to wait for the printer you built it for to open up to be able to print.”
When it comes down to specs, speed, accuracy, and cost-effectiveness are the key metrics by which to judge a printer. While it would be great to find all three in one printer, the reality, says McInnis, is that you’re only likely to get two out of three. “You typically make a sacrifice. If you get a cheap printer, it’s not going to be fast and accurate. There’s going to be a compromise and you’re going to have to make a choice which is more important to you.”
With regard to lab space, like most orthodontic practices, McInnis did not build the lab at his main location 5 years ago with 3D technology in mind. While his ventilation system was already equipped to handle the 3D printing operation, he did reconfigure a couple of outlets and invest in a battery pack surge protector to protect the printers and the prints jobs if the power cuts off and on. And he did pull out cabinetry when he brought in the taller EnvisionOne unit and has remodeled his lab here and there to get the right configuration for the most efficient workflow.

Taking Control of Aligners
McInnis, a graduate of the Medical University of South Carolina, who completed his orthodontic residency at the University of Missouri, Kansas City in 1998, was part of that first wave of orthodontists working with Invisalign when it launched. Initially, cases weren’t as successful as he would have liked. The combination of PVS impressions, materials, and inadequate attachments kept McInnis turning to fixed appliances. But about 5 years ago, his opinion changed as he saw how other orthodontists were pushing the modality’s limits beyond what he considered possible. What’s more, he saw a treatment modality that could help eliminate the decalcification and other hygiene issues that come with fixed appliances. From there, he dug into the biomechanics and realized he could get the results he craved with aligners.
Aligners, and a digital orthodontic workflow overall, allow McInnis to significantly reduce the number of follow-up appointments necessary. This translates into higher revenue for the practice even though the material cost of treating a fixed appliance patient is lower.
“Braces themselves are cheaper than say aligners, but you end up seeing the patient almost twice as much. [With aligners,] you can treat a patient with a more expensive lab bill and still come out ahead because you’re going to see them fewer times in your office,” he points out.
Today, the practice is evenly split between aligner and fixed appliance cases when it comes to new starts.
McInnis started offering in-office aligners over a year ago, giving patients a more affordable option and reducing his lab costs. Most labs have a fixed fee, regardless of the number of aligners printed, and they often require the full lab fee upfront. As patient down payments are typically lower than the lab fee, it’s often months before the practice breaks even and sees any profit—a concept McInnis never loved.
“With in-office aligners, my initial cost is solely related to the aligners that I fabricate. My costs for producing those aligners are spread out over a longer period of time,” says McInnis, who offers patients the choice between braces and aligners, and then between in-office aligners or Invisalign. The patient chooses, but McInnis is able to offer a lower down payment with in-office aligners because of the pricing structure as it relates to the lab bill. McInnis opts to print smaller aligner orders in house, leaving the larger orders to outside labs.
Now in terms of costs, McInnis is quick to dispel the idea that the cost of the 3D printer should be the barrier to printing in-office aligners. Often, he hears colleagues cite the $8,000-$15,000 cost of a printer as the reason they can’t possibly get into in-office aligners, while at the same time they didn’t bat an eye at a $150,000 x-ray machine or a $30,000 intraoral scanner. “You obviously make choices based on a number of factors, but don’t look at the cost as the big deterrence because where there are more expensive things that you use in your practice on a daily basis. This particular one will allow you to generate a different revenue stream,” he points out. For McInnis, labor is the largest expense, not his 3D printer. Currently, he has two-full time lab techs.
For those who do decide to make the plunge, McInnis cautions against the budget printers. Yes, the upfront costs and resin costs may be less, but there’s a trade off in terms of accuracy, reliability, and staff time. “Having consistency of workflow and dependability of a commercial machine was the direction that I went,” says McInnis, who next plans to expand into printing indirect bonding trays. “Ultimately, I was trying to have something that would cut down on staff time because labor amounts to one-third the cost of the aligner,” while the printer cost averages about 50 cents per aligner in his practice. His in-office lab fabricates on average 110 aligners per day.


According to McInnis, the maximum number of aligners the practice produces and delivers to a patient at any one time is 12 upper and 12 lower aligners. And there’s a reason for that.
“When you use Invisalign, they send you all of your aligners for the whole case upfront. We typically will deliver all those to the patients, so we don’t have them in the office. But there’s quite a few patients that will have a tracking error. You may try to just get through the aligners that you have before you rescan them, but as tracking errors happen…fit issues become more of an issue, and then your level of control goes out the window,” he explains.
“Well, if you have an Invisalign case, you may just keep pushing through those aligners or you may set up a refinement scan. On occasion, you may have to throw out a good number of aligners. If you’re making them in house, you don’t have to make all of them upfront. I typically will make 12 and see the patient back in 10 weeks to evaluate the fit of the aligners. If they fit properly, we’ll go ahead and print the rest of them, and the patient can just pick them up at the front desk. But if we do have a fit issue, where we’re starting to get a tracking error, then instead of going ahead and making the rest of the aligners and having a poor return on investment or not getting as high a percentage out of the movement that we programed in, we will reschedule them back in 2 weeks for a refinement scan and redo the case. At that point in time, they’ll have proper fitting aligners and we don’t end up having to throw away aligners because we made them all upfront. We are able to mitigate that because we can turn them around so much faster.”
The case control and revenue potential of an in-office 3D printing operation is evident, but that’s not to say that there aren’t hurdles that can’t be ignored, says McInnis, but they are surmountable. Whether it be mastering a new software and learning how to set up and stage your own cases or learning digital production and how to scale that up, the payoff is there for the taking. It just requires flexibility and an openness to learning a new workflow that will carry the practice forward. OP